How a Fiberglass Pool Shell Is Installed (Step-by-Step)
Introduction
Welcome to “How a Fiberglass Pool Shell Is Installed (Step-by-Step),” your comprehensive educational resource for understanding what goes into transforming a backyard with a beautiful and long-lasting fiberglass pool.
Calmwater Pools helps homeowners in Maryland, Washington DC, Northern Virginia, and nearby West Virginia select the right fiberglass pool model, coordinates procurement of the shell, and arranges delivery to your project site. Installation is performed exclusively by qualified independent contractors hired directly by the homeowner. This guide is intended to help you understand the full installation process so you can work confidently with your contractors from start to finish.
Fiberglass pools are renowned for their durability, ease of maintenance, and efficient installation process. Unlike traditional concrete pools, a fiberglass pool shell comes pre-formed and ready to install, making it an excellent choice for homeowners who want a quality result with a streamlined build timeline.
Explore our Fiberglass Pool Shells and Custom Pool Shells to find the right size and shape before your project begins.
Choosing a fiberglass pool is an investment in a cost-effective solution that increases the value of your property. Fiberglass pool benefits include a smooth, non-abrasive surface, reduced chemical usage, and minimal ongoing maintenance, ensuring that your pool remains a pristine oasis for years to come.
Learn more about our complete line of Fiberglass Pools.
This guide will walk through each phase of the installation process—from planning and excavation through plumbing, backfilling, and finishing—so you and your contractors are aligned on what a successful installation looks like.
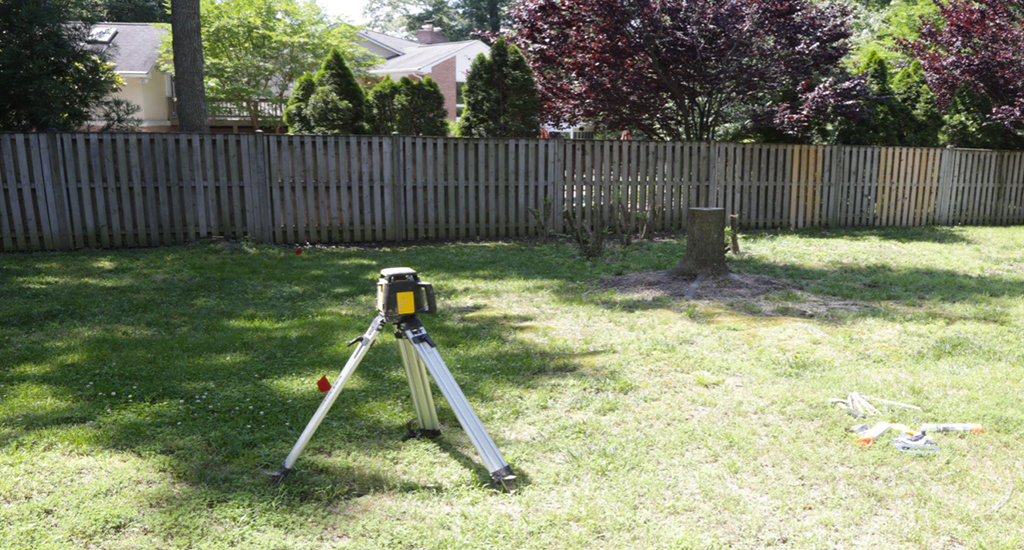
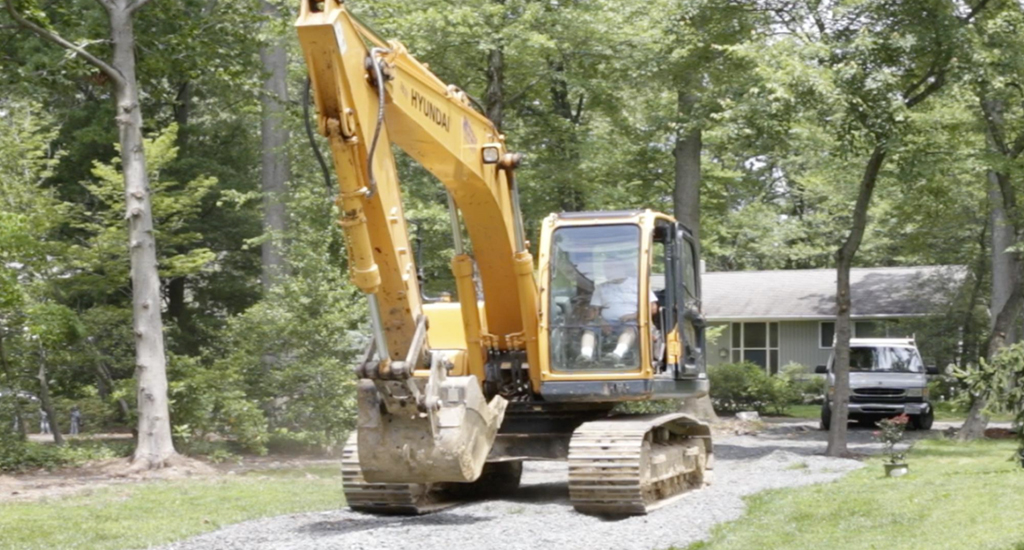
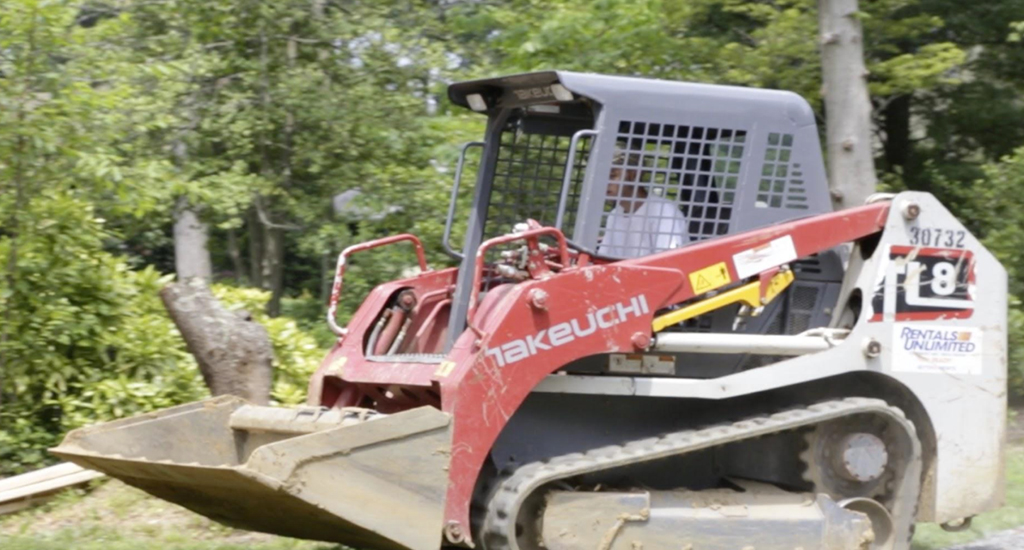

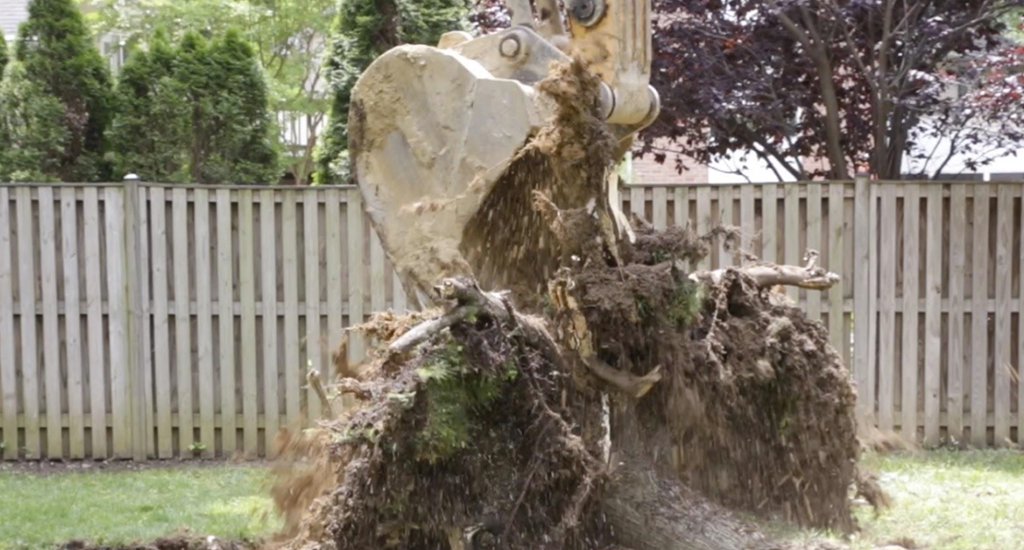
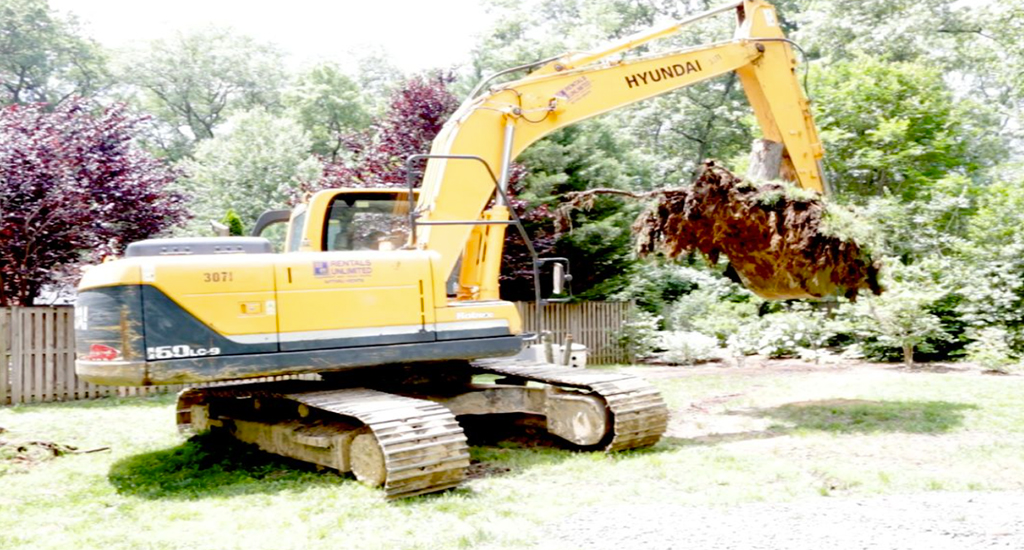
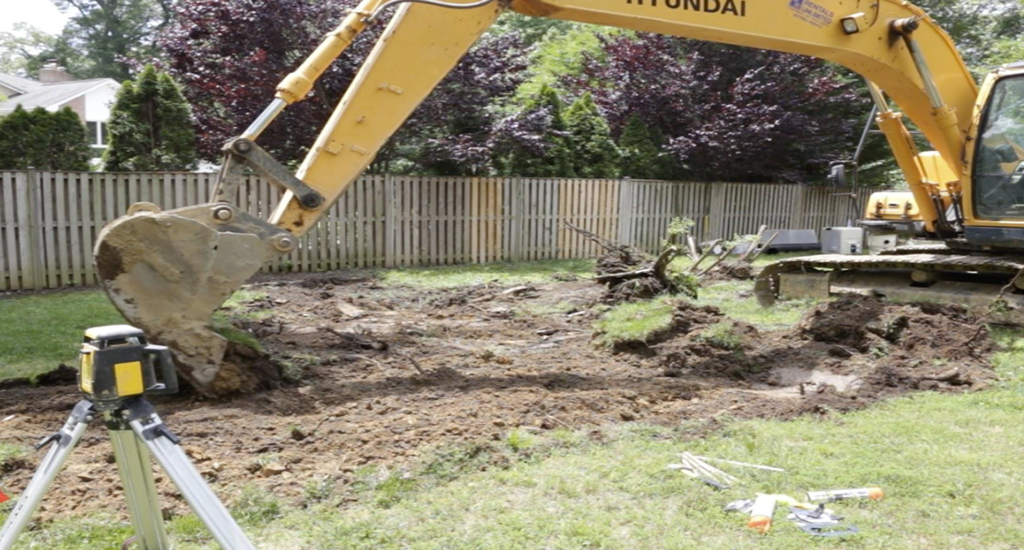


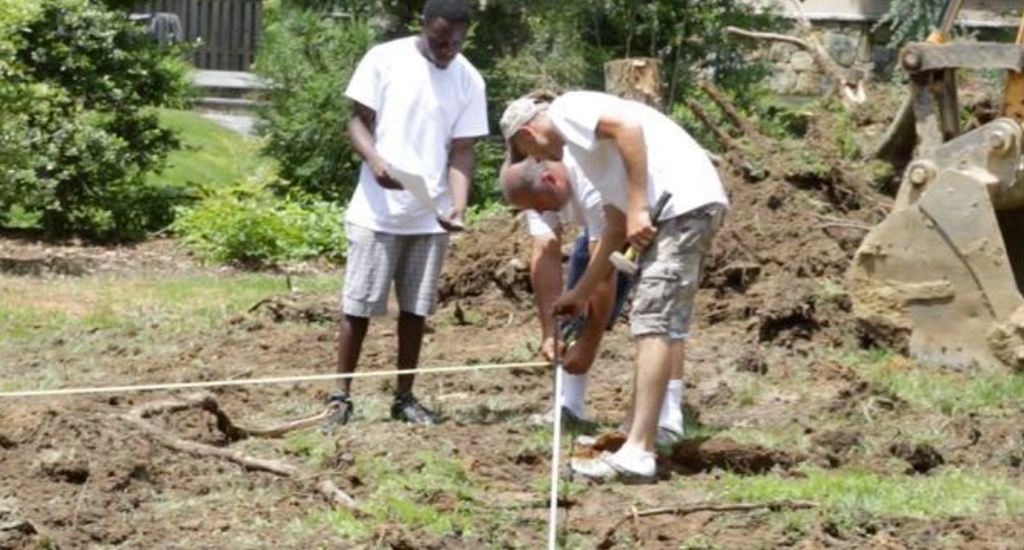
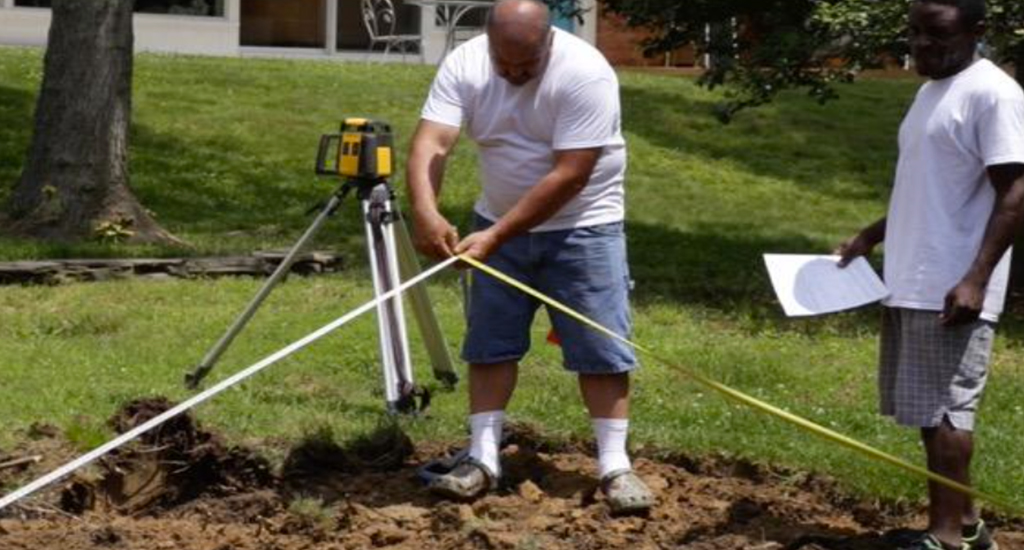
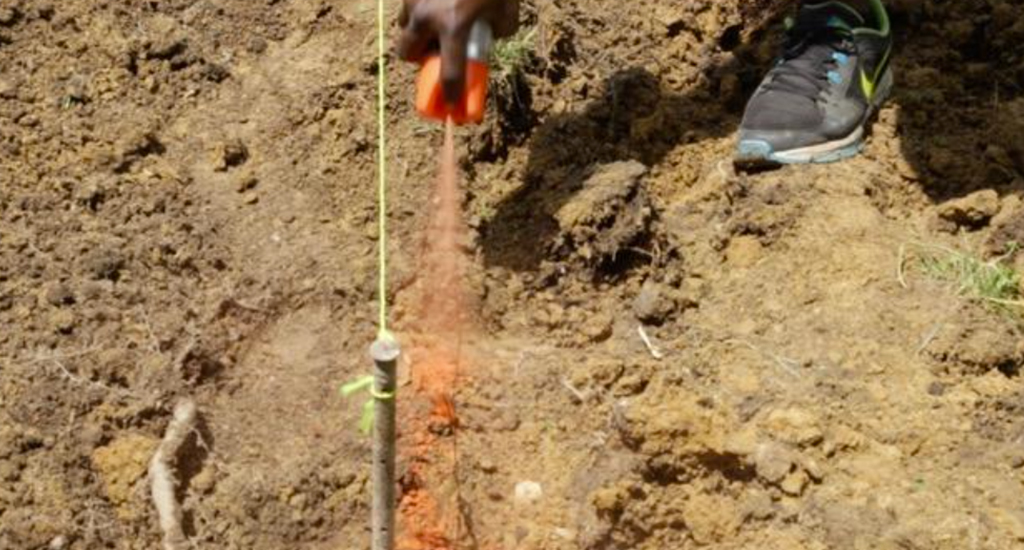


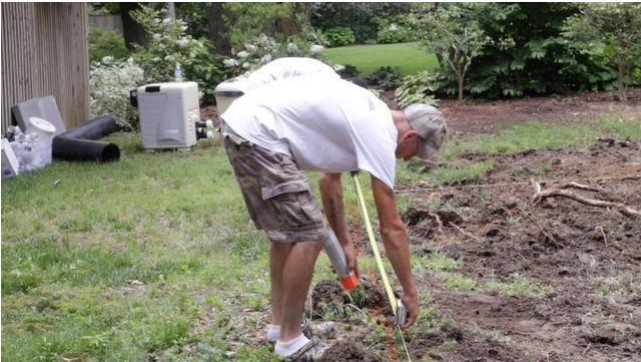
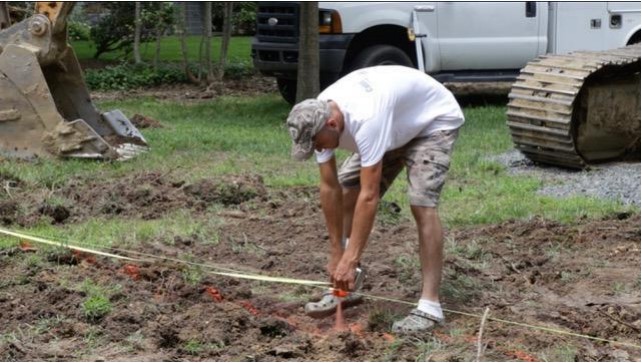
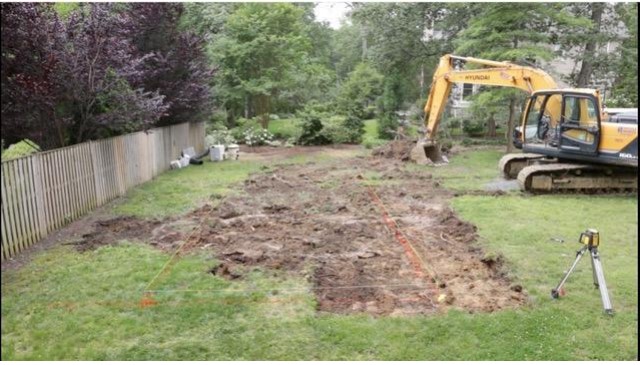
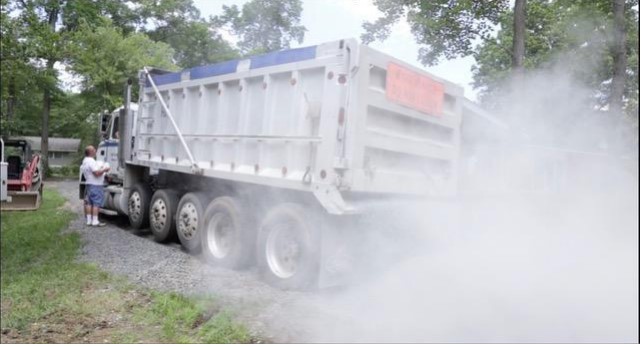
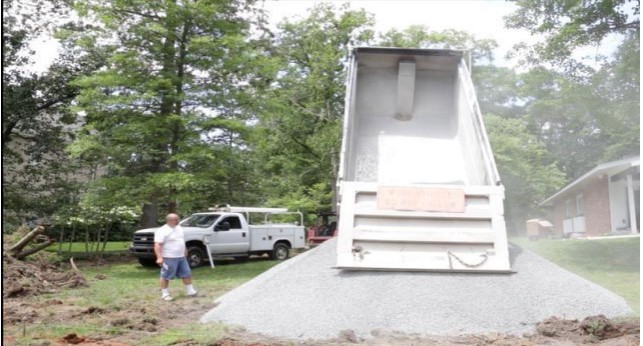
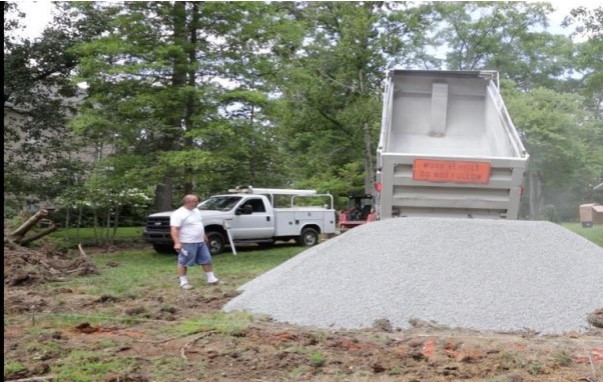
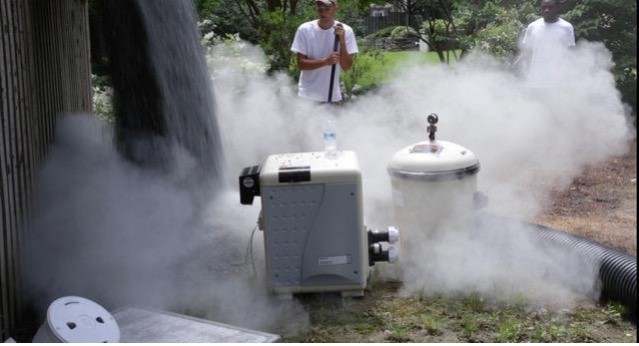
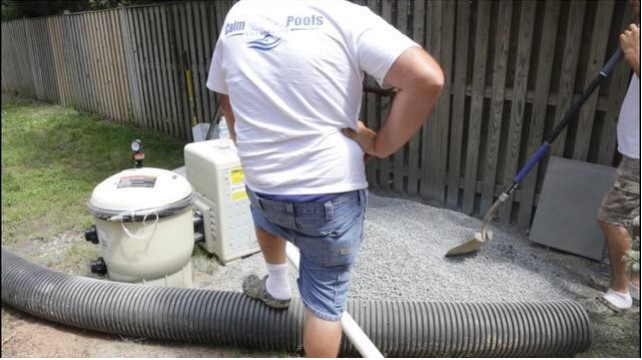
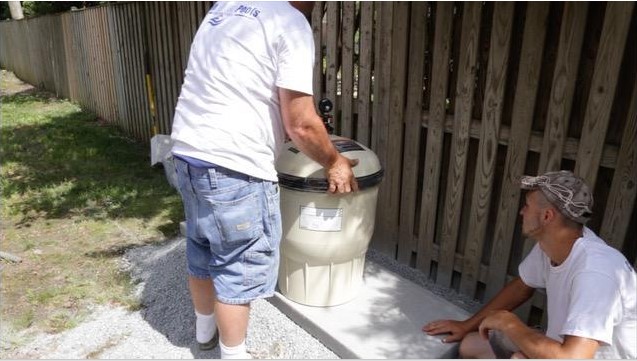
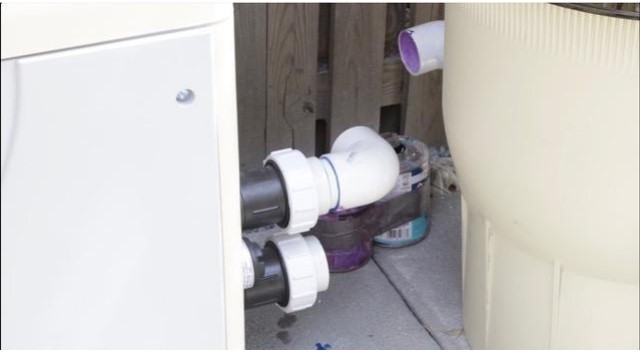
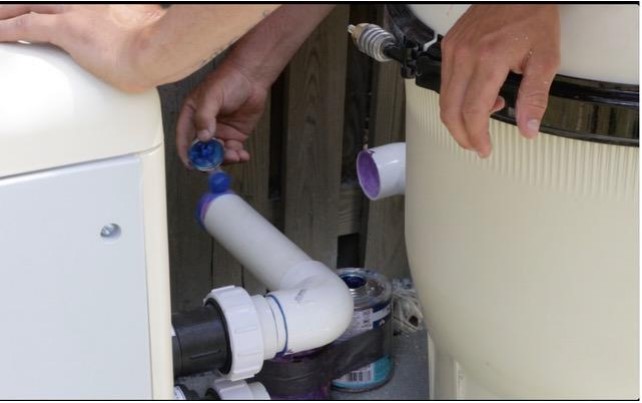
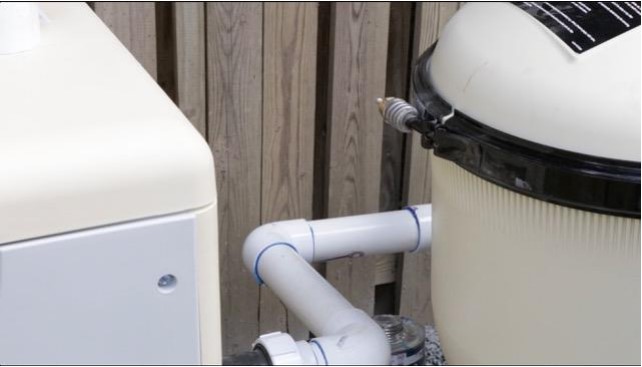
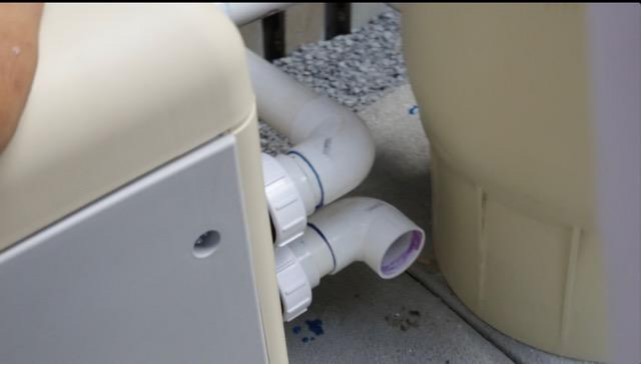

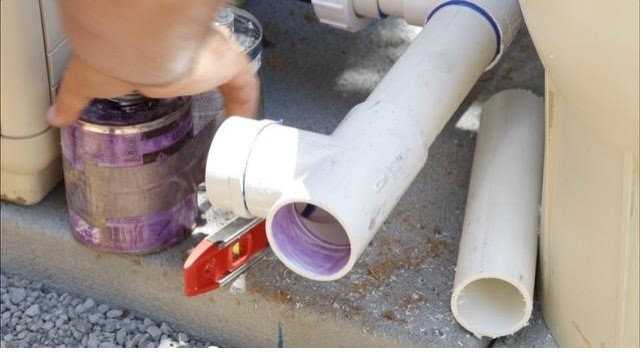
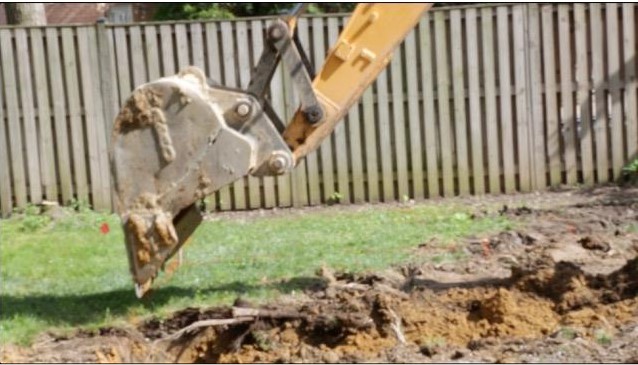
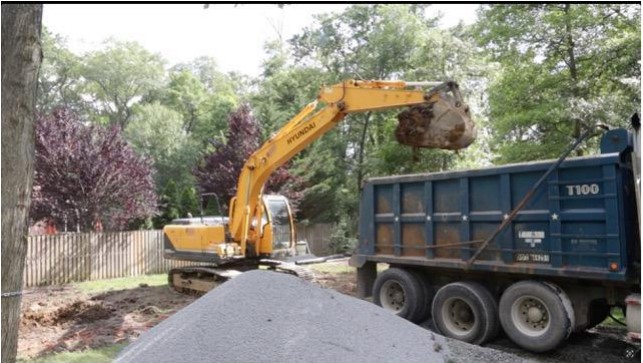
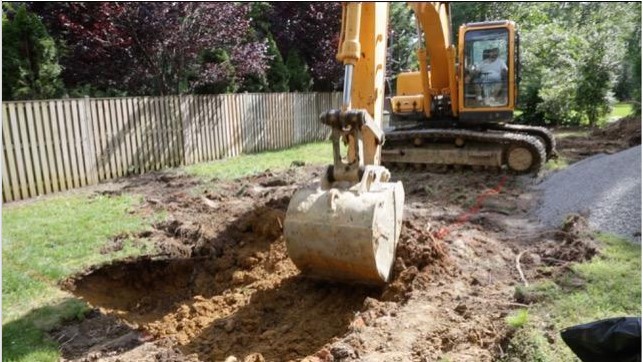
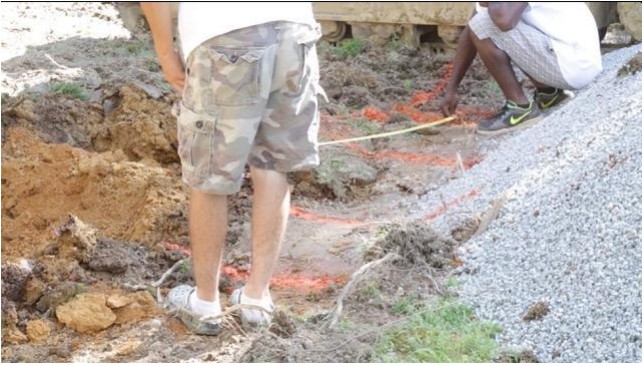
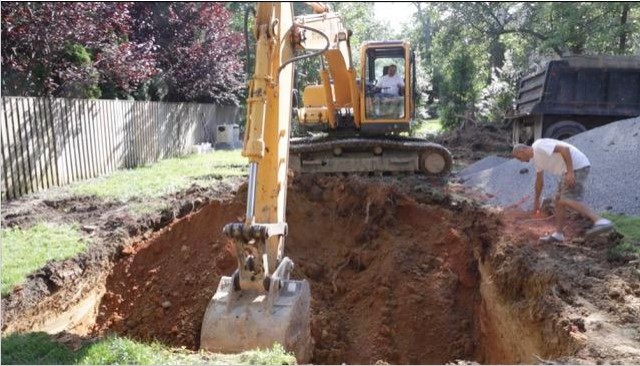
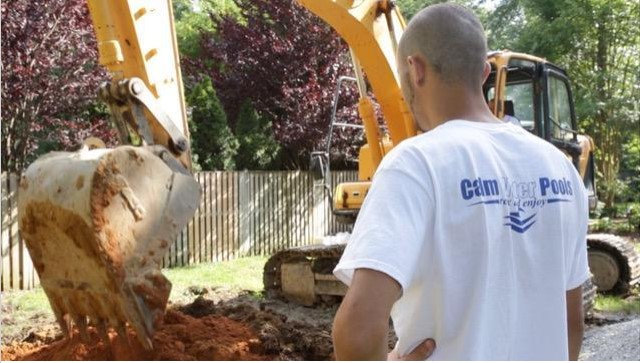
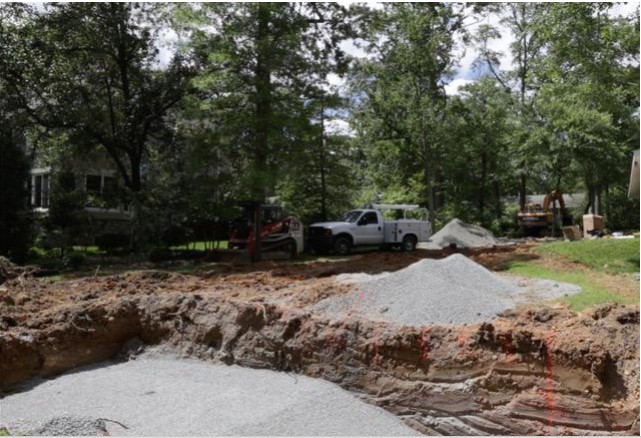
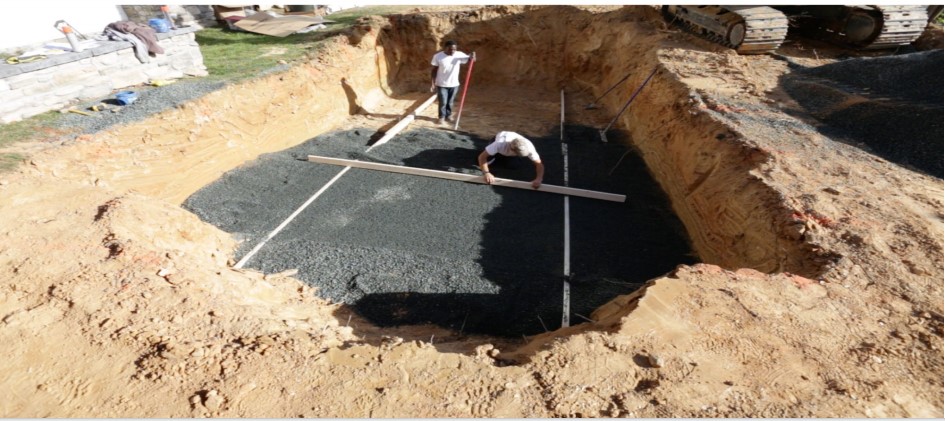
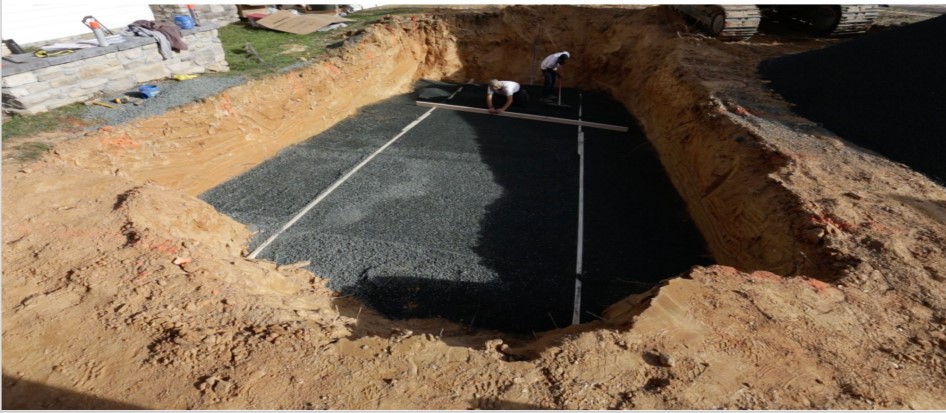
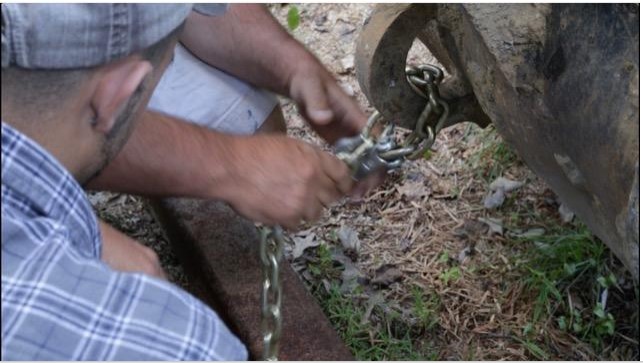
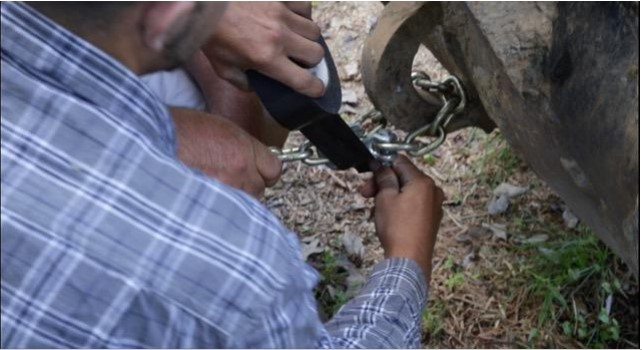

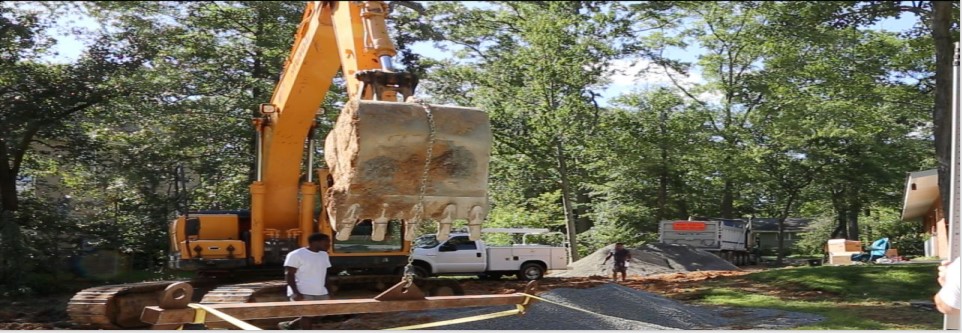
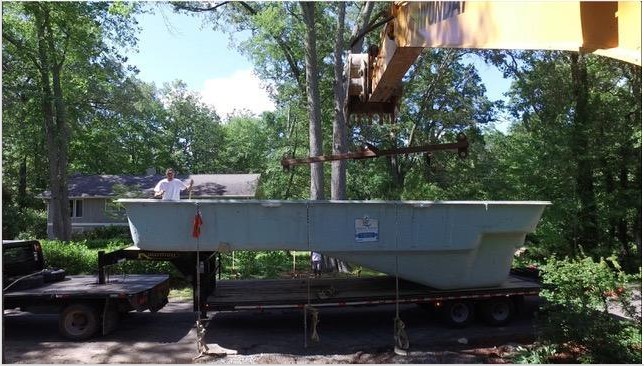
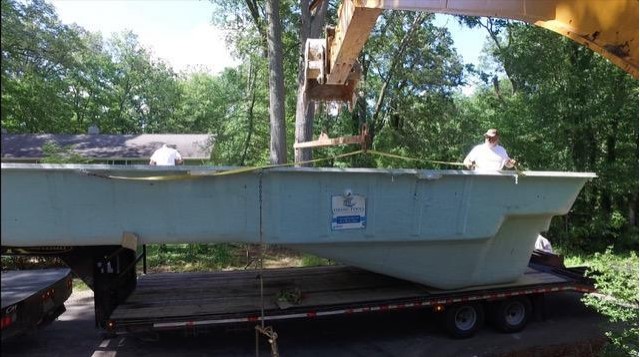
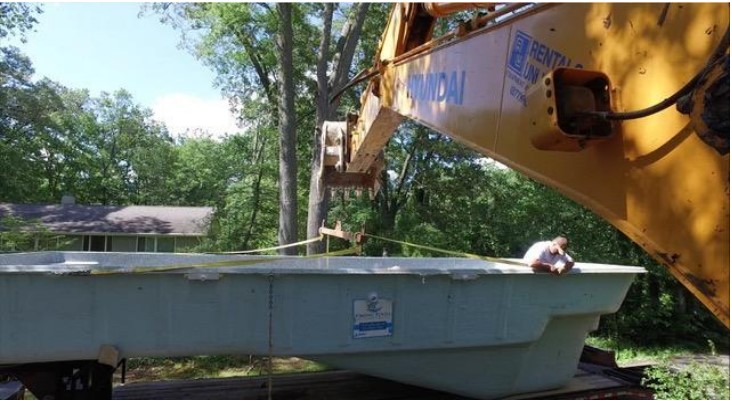
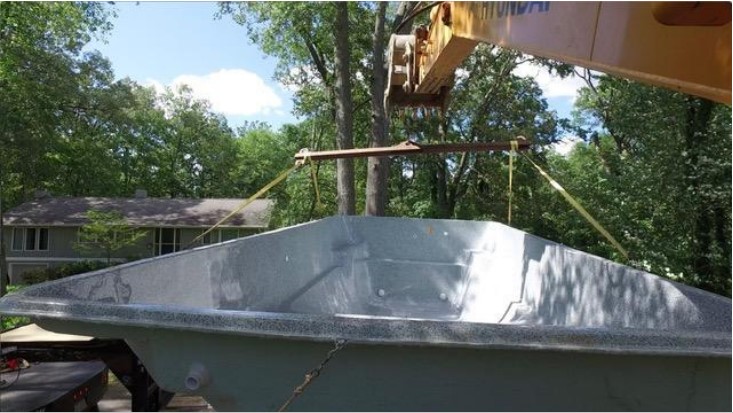
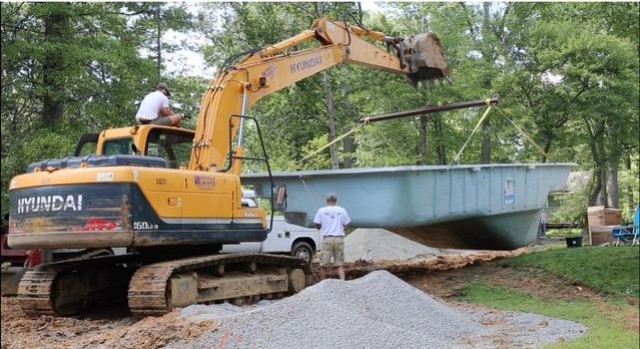
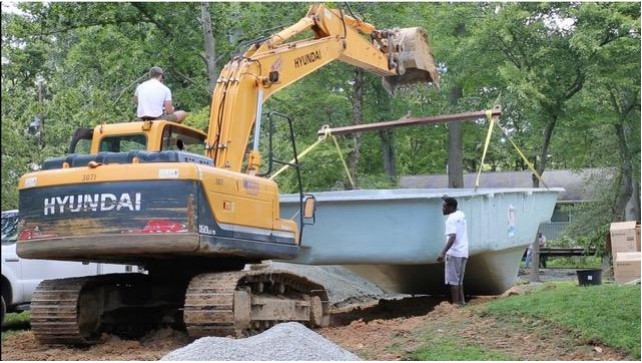
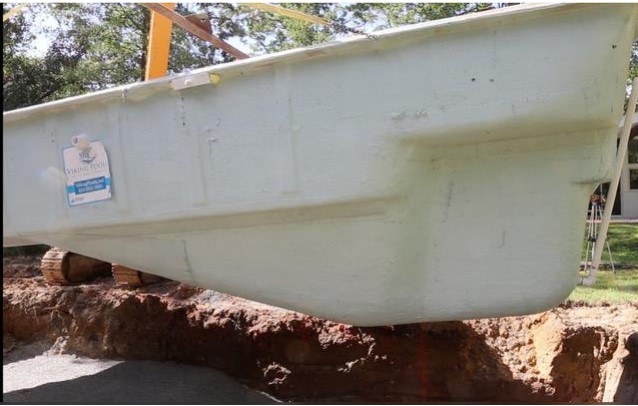
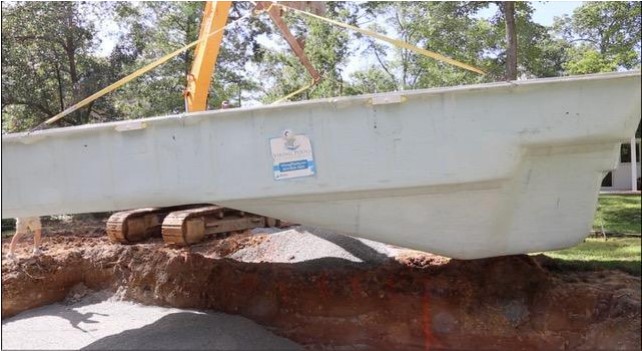
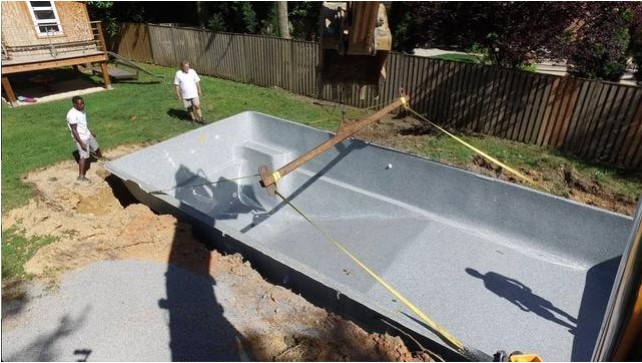
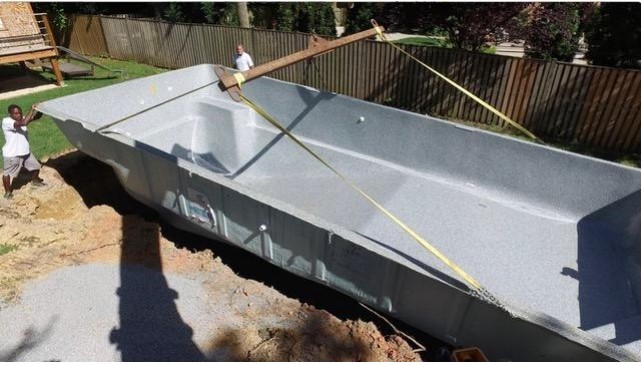

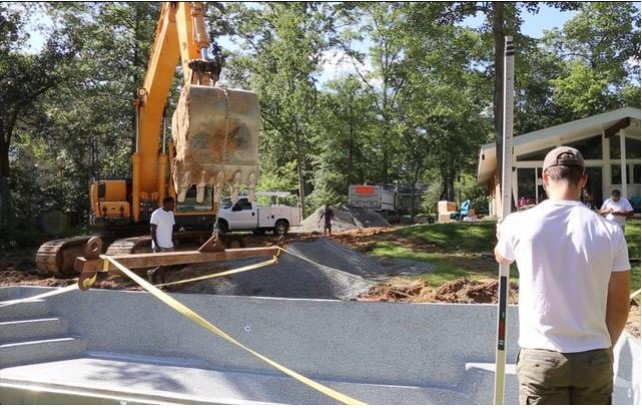

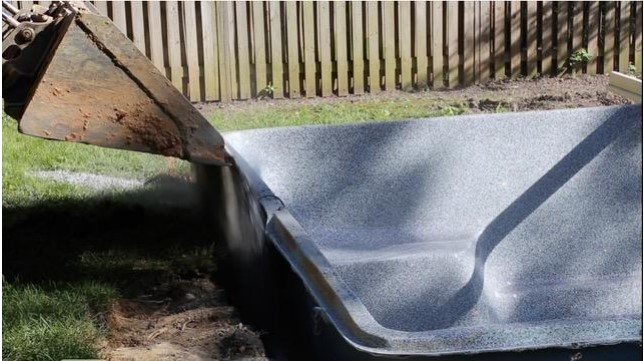
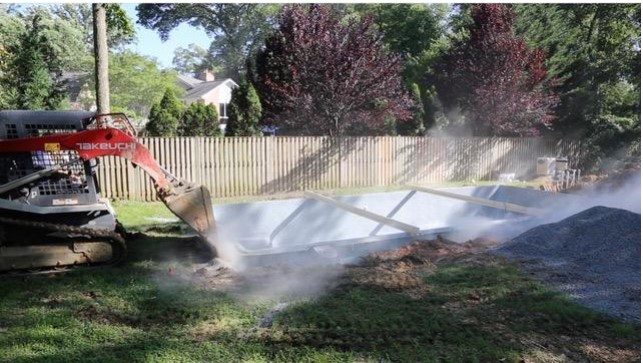
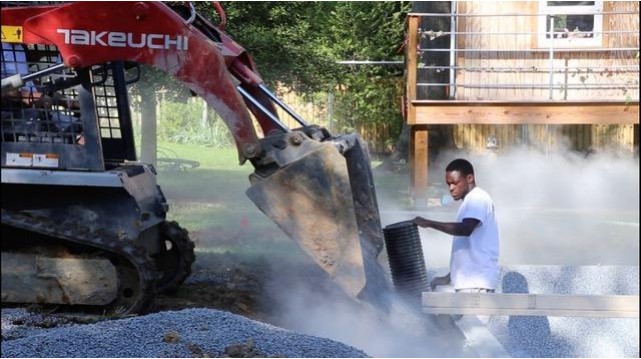
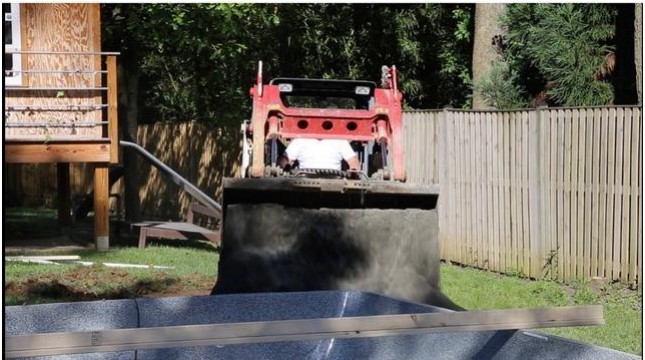
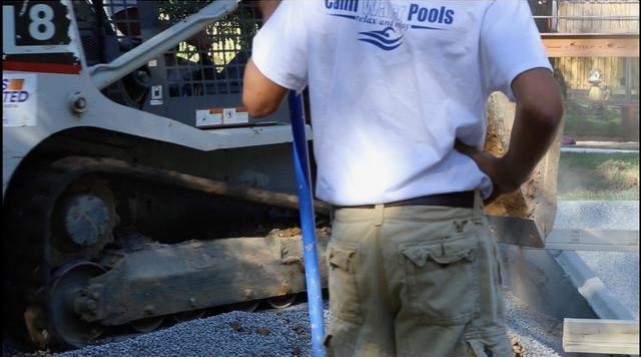
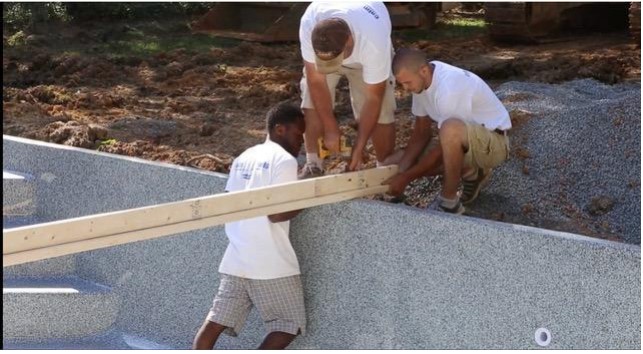
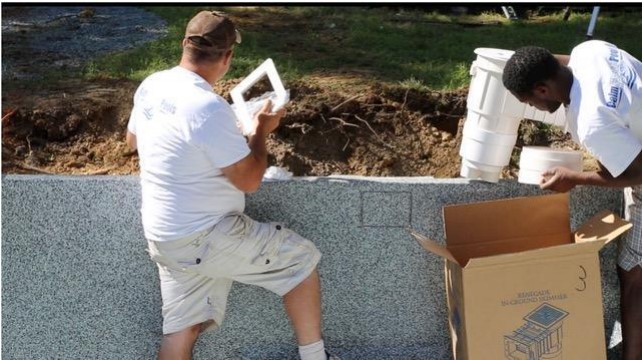
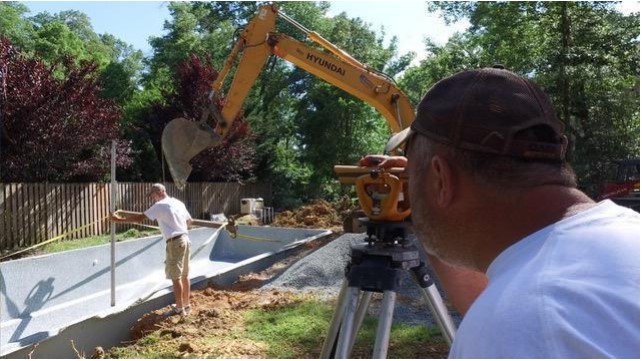
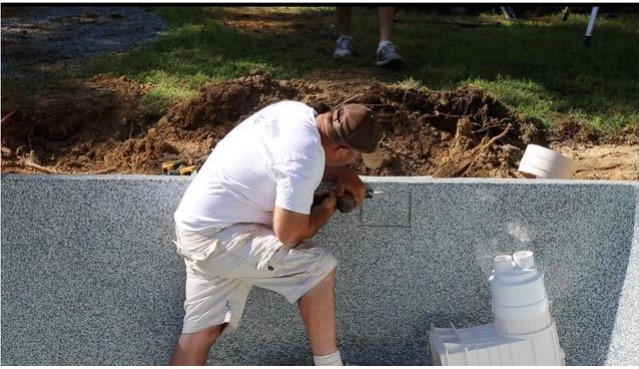
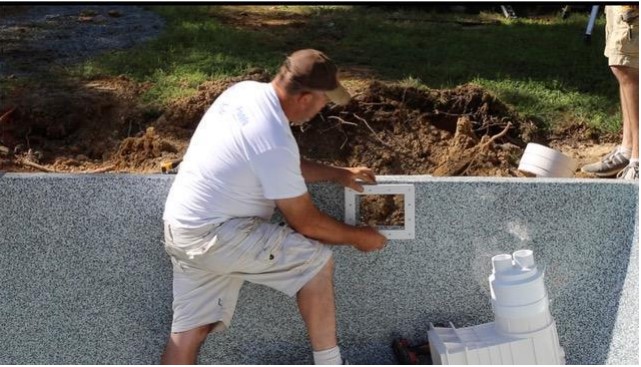
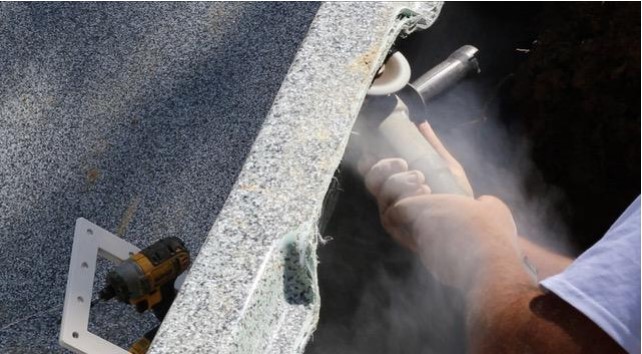
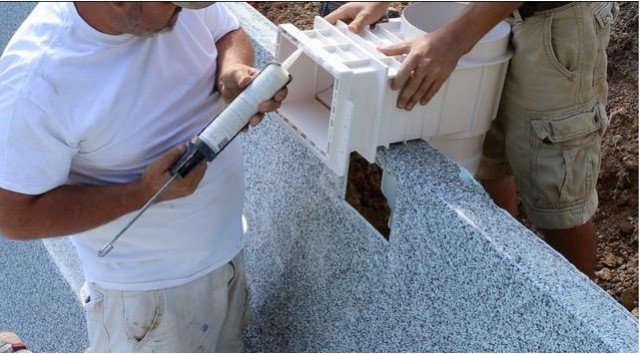
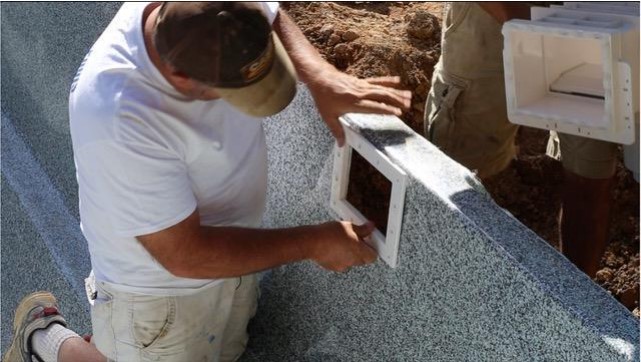
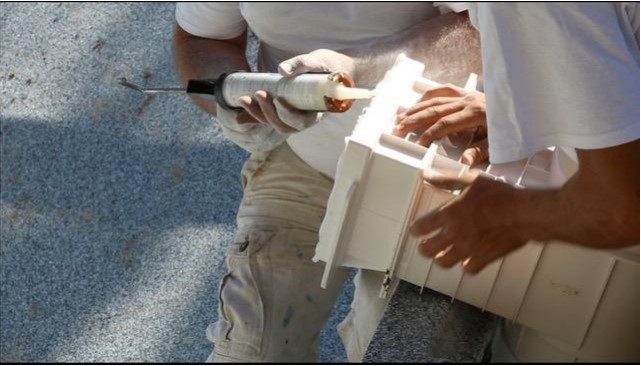
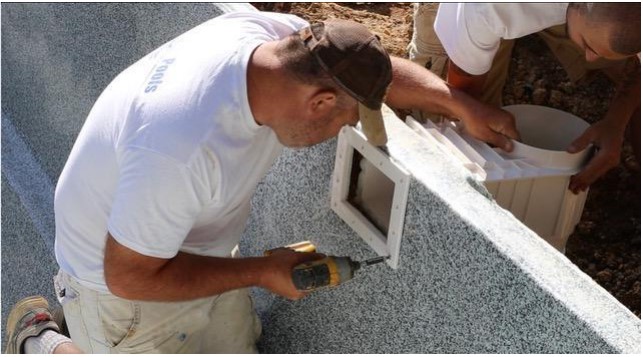
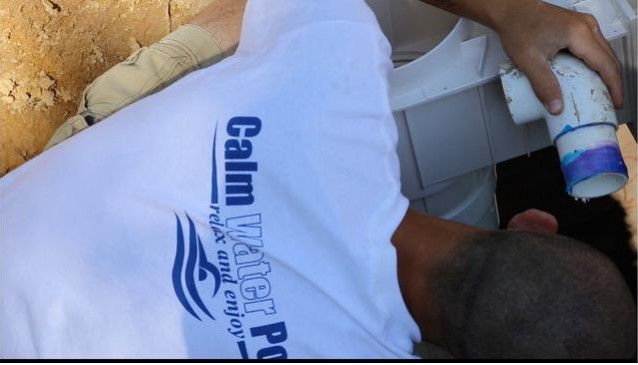
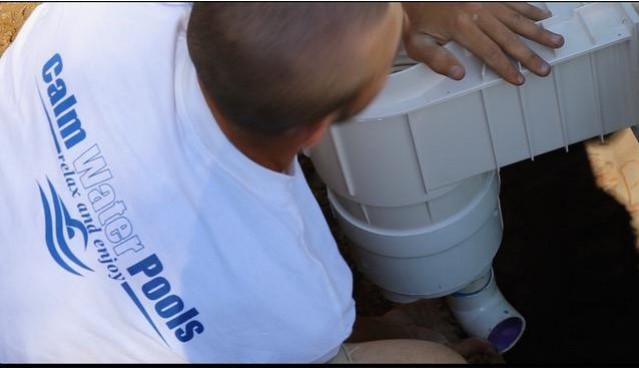
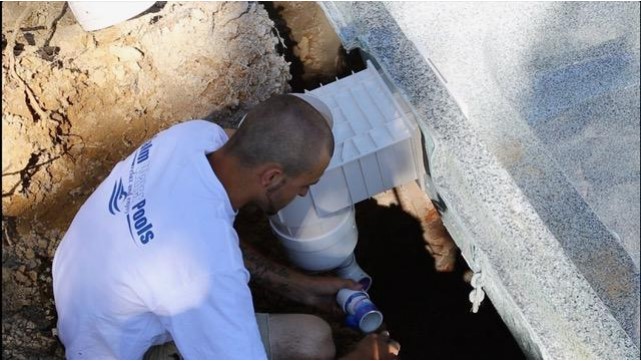
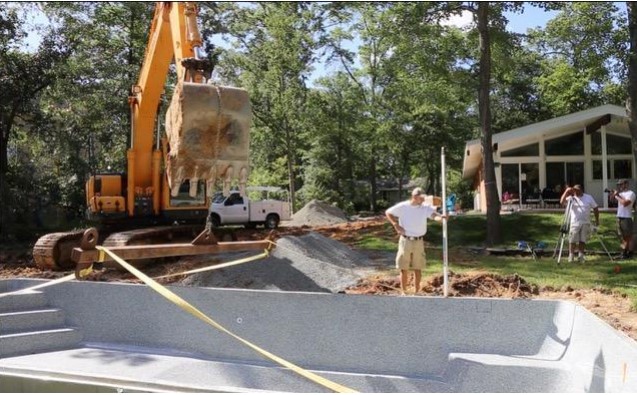
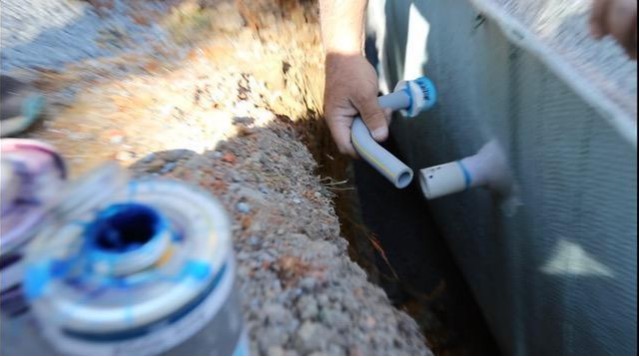
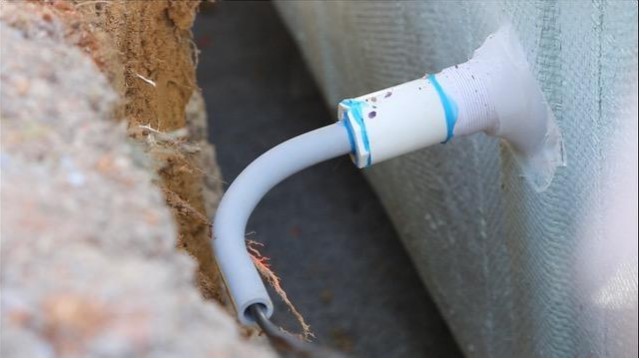
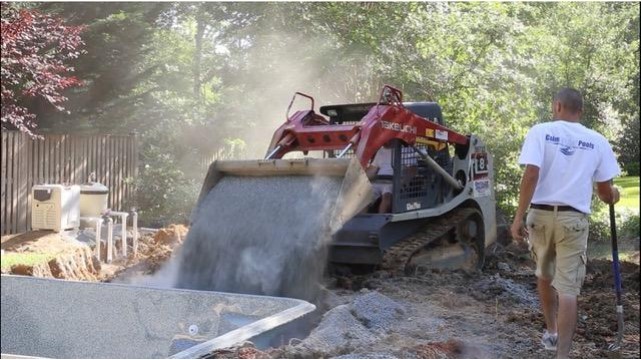
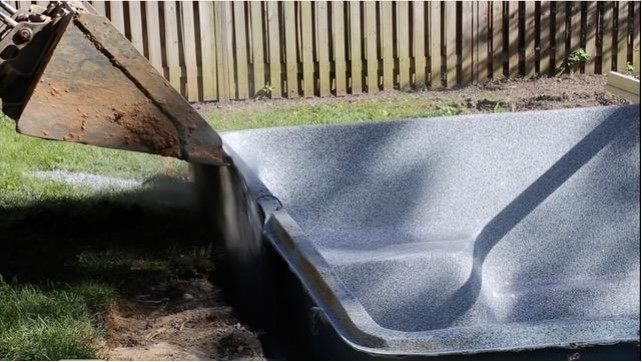
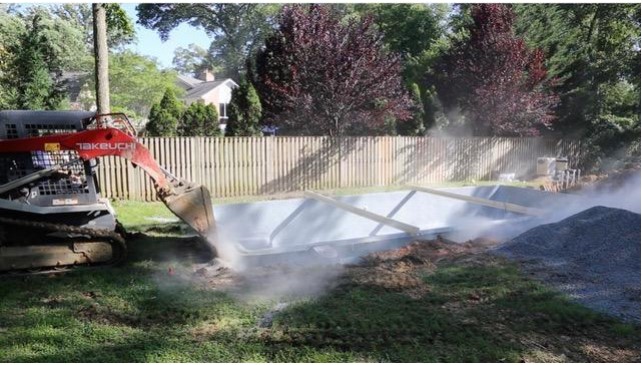
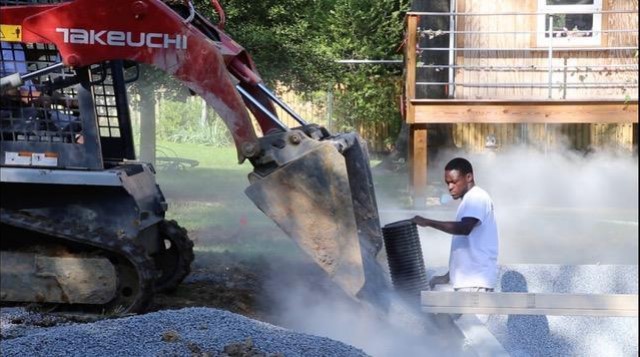
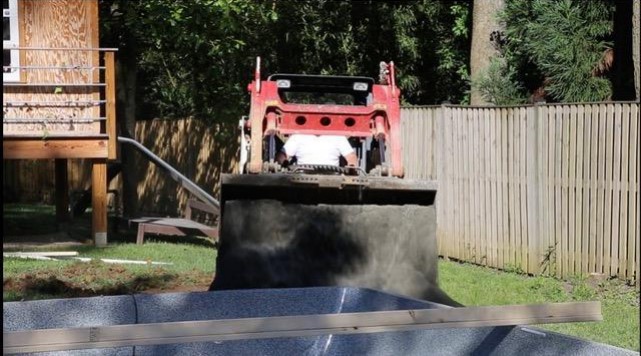
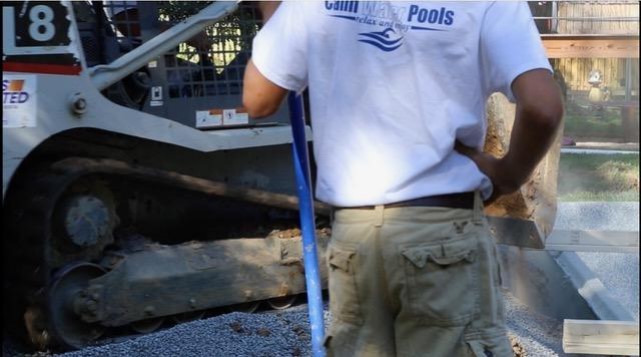
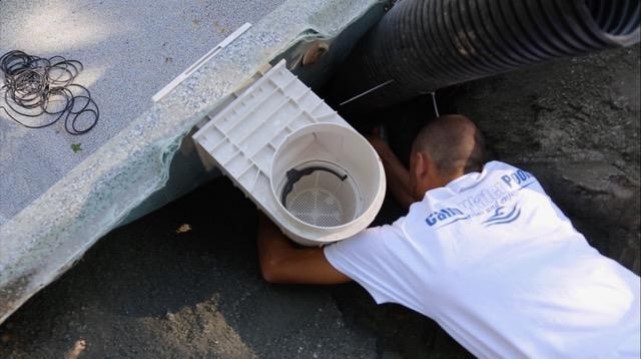
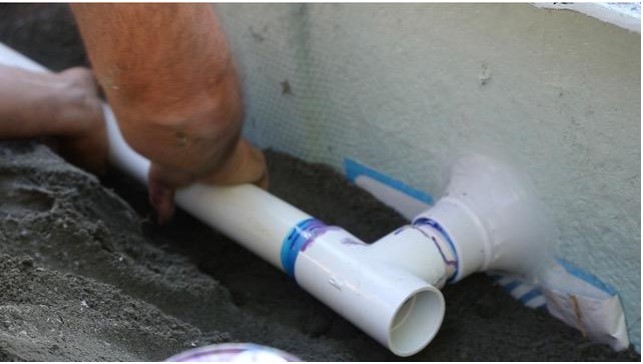
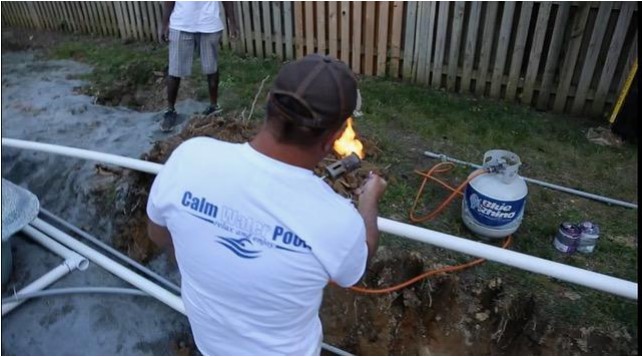
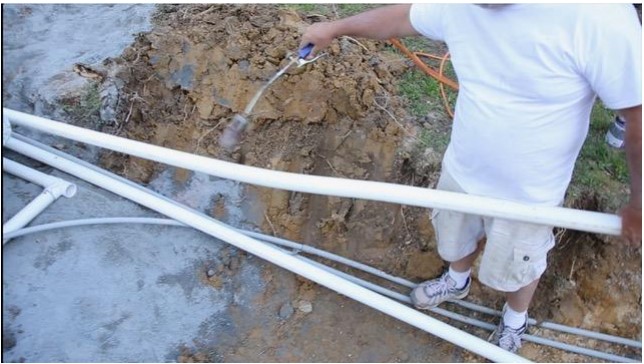
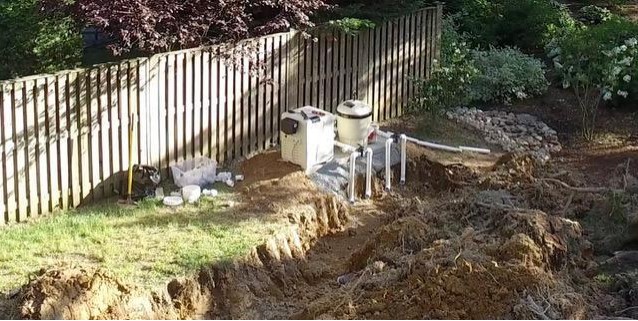
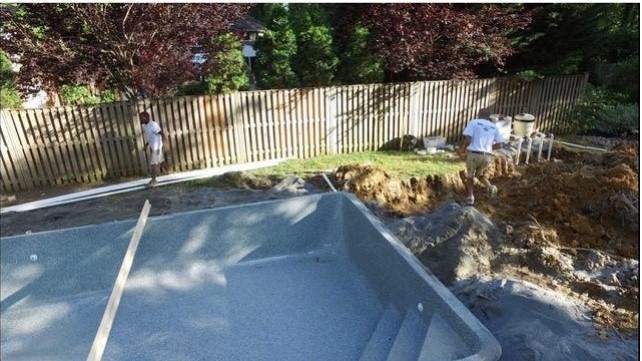
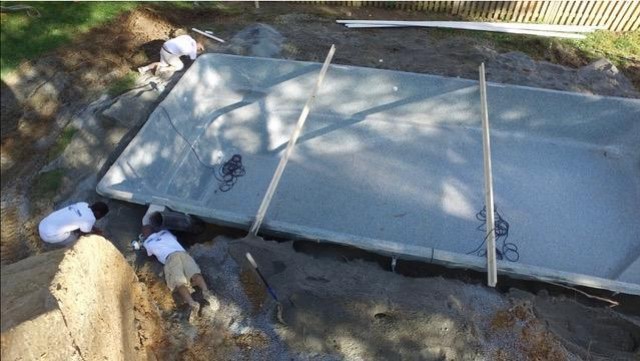
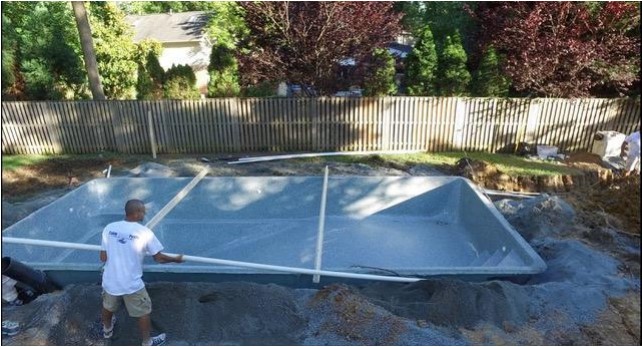
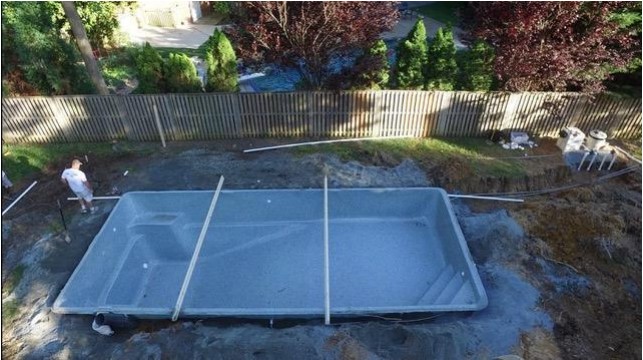
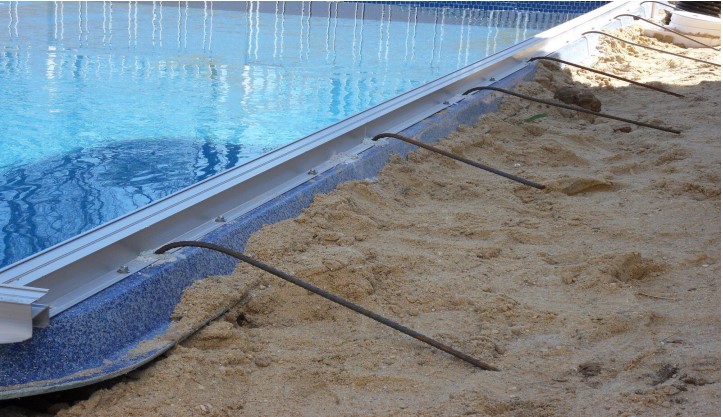
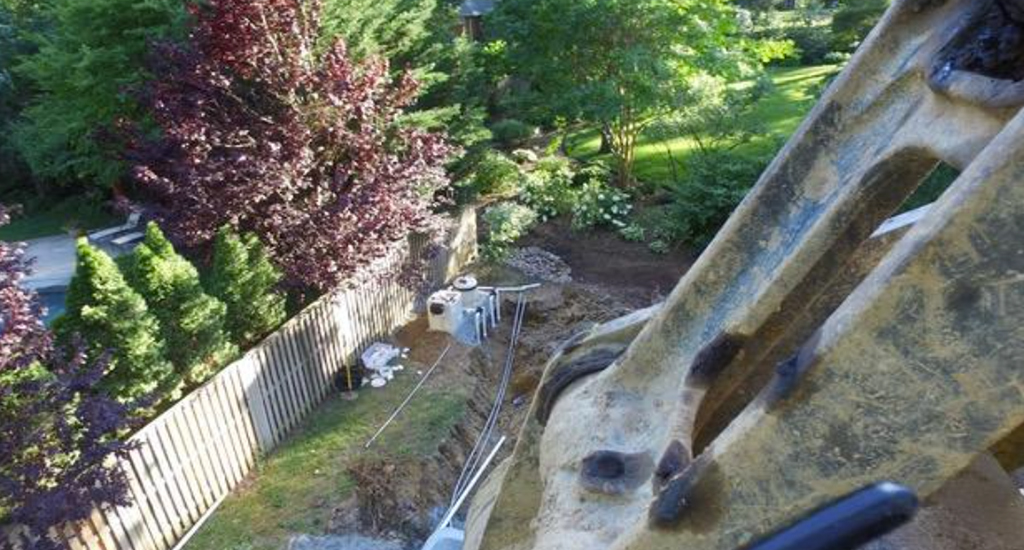
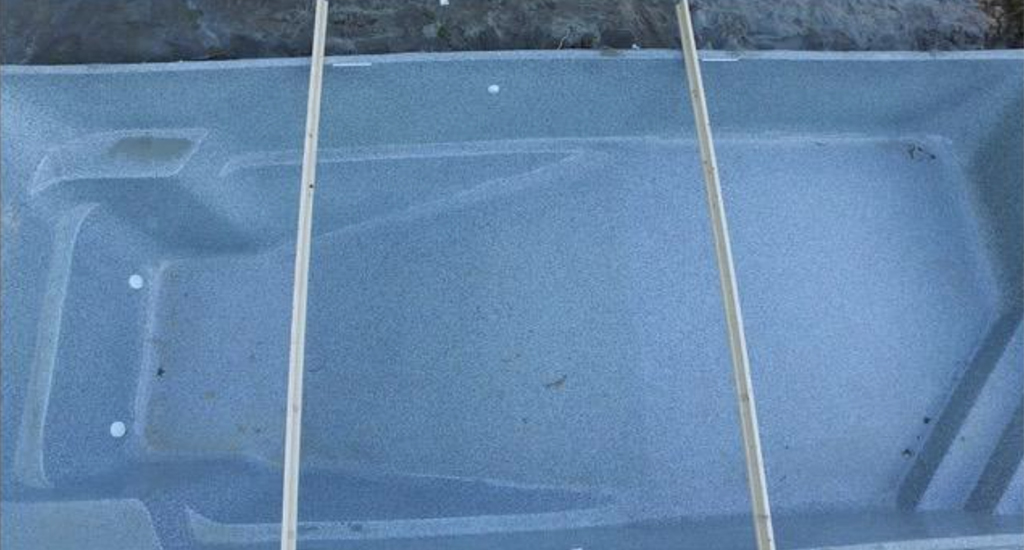
Table of Contents
Introduction
- Overview of the benefits of fiberglass pools
- Brief explanation of the installation process
Preparation
- Assessing your backyard for a fiberglass pool installation
- Checking zoning laws and obtaining permits
- Tools and equipment needed (e.g., 16 metric ton excavator, rubber track loader)
- Importance of having a clear plan (e.g., manufacturer dig sheet)
Site Preparation
- How contractors prepare the site for installation
- Checking the level of grade
- Removing obstacles (e.g., stumps) and disposing of them properly
- Setting corner stakes and marking the area for excavation
Excavation
- Step-by-step guide to excavating the site
- Using an excavator with a 28′ reach for difficult accesses
- Continually checking and adjusting the excavation depth and dimensions
- Tips for efficient and safe excavation
Preparing the Base
- How contractors prepare the base for the pool shell
- Importance of a solid and level base (using gravel and stone)
- Installing non-perforated pipes for drainage
- Screeding the area to ensure it’s perfectly level
Installing the Pool Shell
- Detailed steps for setting the pool shell in place
- Attaching the shell to the excavator with chains and a spreader bar
- Carefully positioning and lowering the shell into the excavated hole
- Checking for level and making adjustments as necessary
Plumbing and Backfilling
- Guide to installing plumbing and backfilling around the pool
- Starting plumbing with the heater and extending to skimmers and returns
- Proper backfill material and techniques for stability and drainage
- Ensuring the pool walls are supported during backfilling
Finishing Touches
- Final steps to complete the pool installation
- Installing additional features (e.g., lights, skimmers, equipment pads)
- Filling the pool with water and checking for leaks
- Landscaping and decking ideas to enhance your new pool area
Maintenance Tips
- Basic maintenance tips for your new fiberglass pool
- Regular cleaning and chemical balance
- Seasonal maintenance advice
- Protecting your pool during colder months with Inground Pool Winter Safety Covers
Conclusion
- Recap of the steps covered
- How Calmwater Pools supports your project from model selection through delivery
Efficient Installation of Fiberglass Pool Shells
Choosing a fiberglass pool shell is a practical and cost-effective decision, particularly when working with a trusted source for shell procurement and delivery. Fiberglass pool shells manufactured by Latham Pool Products are celebrated for their streamlined installation, which qualified independent contractors can often complete within a very short project window. The design of these shells simplifies the process considerably, as they come pre-molded with steps and seating areas already formed. Before installation begins, your contractor will select the appropriate backfill material—typically clean angular gravel—which supports the shell evenly and accommodates natural ground movement without shifting. This ensures the long-term stability and longevity of your inground fiberglass pool.
Creating a Personal Oasis with a Fiberglass Pool
A fiberglass pool installation elevates your backyard into a lasting retreat. The process involves meticulous planning and preparation by your qualified independent contractors, resulting in a durable and aesthetically pleasing addition to your home. Fiberglass pool shells manufactured by Latham Pool Products are engineered for a straightforward fit, which simplifies everything from positioning the shell to completing the plumbing and final backfill. The finished product brings endless hours of enjoyment and relaxation. Furthermore, inground fiberglass pools require less maintenance than traditional concrete pools, making them an excellent long-term choice for homeowners.
For homeowners in Maryland, Washington DC, Northern Virginia, and nearby West Virginia, Calmwater Pools is your local resource for selecting the correct fiberglass pool model, coordinating shell procurement, and arranging delivery to your project site. Installation is handled exclusively by qualified independent contractors engaged directly by the homeowner. A standard project includes the pre-formed fiberglass pool shell manufactured by Latham Pool Products, which has transformed inground pool installations by enabling a streamlined build timeline. Once the shell is set in place, pool equipment such as pumps and filters can be connected by your licensed contractors. Whether you’re planning a large inground pool for the whole family or a more intimate design, the variety of available shell models offers endless possibilities to customize your outdoor space.
Additional Detailed Guide to the Fiberglass Pool Shell Installation Process
The outline and step-by-step notes above provide a solid framework. This expanded section walks through each phase in more detail so homeowners can better visualize the full project, understand why each step matters, and work effectively with their contractors. Think of this as a commentary track that explains what is happening and what to watch out for as the project progresses.
1. Planning and Design Considerations
Before any dirt is moved, time should be spent planning the overall layout of the backyard. Consider the space where the pool will be located and evaluate:
Sun exposure: Pools are more enjoyable when they receive good sunlight during the day. Observe how the sun moves across the yard and position the shell where it will get the most use and warmth.
Privacy: Think about sightlines from neighbors’ windows or from the street. This is the time to plan for privacy fencing, hedges, or decorative screens.
Access for machinery: Equipment such as a 16 metric ton excavator and a rubber track loader require a clear access path into the yard. This may mean temporarily removing a fence panel or gate.
Future features: Visualize where the pool equipment pad, deck, patio furniture, outdoor kitchen, or pergola might go. Leaving enough space now prevents frustrations later.
Taking photos and sketching a simple overhead layout can help communicate clearly with contractors and vendors. When combined with the manufacturer’s dig sheet and any engineered drawings, this creates a clear roadmap that keeps the project organized.
2. Understanding Permits and Local Requirements
Every region has its own rules for pool installation. Before work begins:
Contact your local building department to ask about pool permits, inspections, and safety requirements.
Confirm setback requirements, which determine how close the pool can be to property lines, structures, and utilities.
Ask about barriers and fencing—many jurisdictions require specific fence heights, self-closing gates, and sometimes alarms on doors leading to the pool area.
Check utility locations by requesting a utility locate service. The location of gas, electric, water, and sewer lines must be confirmed before excavation begins.
Ensuring the project is fully compliant from the start saves homeowners from expensive corrections later and ensures the pool area is safe and legal.
3. Detailed Site Preparation
When contractors check the level of grade to set height for pool shell, they are establishing the finished height of the pool in relation to the rest of the yard and any planned decking. This is a crucial step:
A laser level or transit is used to mark a consistent reference height on stakes around the site.
Drainage and slope away from the pool must be considered so water does not pool around the shell or the home’s foundation.
Removing stumps and vegetation early, and having the tree vendor leave the stump at 3–4′ height, gives equipment something to grab onto, making removal much easier.
Once topsoil is scraped off and the working area is clearly defined, contractors begin setting corner stakes, confirming square for pool shell excavation, and running string lines. Taking extra time to double-check measurements and diagonals ensures the pool will sit correctly in its final position and that coping and decking will look even and professional.
4. Using Heavy Equipment Safely and Efficiently
The equipment involved—16 metric ton excavator with a 28′ reach and rubber track loader with a 68″ bucket—is what allows contractors to move large volumes of soil and heavy materials safely.
A few practical notes:
Operator experience matters. Licensed excavation contractors should be engaged for the excavation and pool set phases to ensure safe and precise work.
Dump truck and dumpster placement should be planned so that excavated soil and stumps can be removed without blocking site access.
Job site organization is important. Designated areas for base stone, backfill material, and equipment pads reduce unnecessary material handling.
When contractors mark the hash marks for the excavator per dig sheet, they are creating depth and contour guides that keep the excavation accurate and matched to the shape and stepped depths specified. Constantly updating these hash marks during excavation reduces the chance of over-digging, which would require additional stone and time to correct.
5. Excavation: Going from Lawn to Pool Hole
When shell excavation begins, the transformation is dramatic. Lawn disappears and a large hole emerges quickly. Key points during this phase:
Loading excavated dirt directly into dump trucks is a clean and efficient method that prevents large soil piles from dominating the yard.
Getting down to grade requires patience—the last few inches should be approached slowly to avoid removing too much material.
Stone in base screeded with 2×4’s for level is where precision really matters. A well-prepared base ensures the pool shell has continuous, even support.
The goal is a clean, flat, and level stone base that matches the dig sheet precisely. Proper screeding of the entire area creates a smooth and stable platform where the fiberglass shell can rest evenly, preventing future settling or stress points.
6. Handling and Setting the Fiberglass Pool Shell
Moving a fiberglass shell is one of the most critical moments of the project. The combination of fastening chain to bucket of excavator, taping chain for extra precaution, and attaching a spreader bar distributes the load evenly:
The spreader bar on the bucket ensures that lifting forces are balanced and that the shell does not twist or flex excessively during movement.
Fastening straps to embedded chains on shell and securing shackles should be done carefully, with all connections double-checked before lifting begins.
When picking up the pool shell and turning vertical for transport, movement should be slow and deliberate, with bystanders kept at a safe distance.
As the shell is transported vertically and placed into the excavated hole, communication between the equipment operator and spotters on the ground is critical. Clear hand signals or radios should be used so everyone is coordinated throughout the lift and placement.
Once the shell is in place, checking the bottom for voids ensures there is uniform contact between the shell and the stone base. Any hollow areas must be corrected immediately by slightly lifting that section of the shell and adding stone. After that, checking the pool in hole for level confirms the shell is within acceptable tolerances—typically not exceeding 1″ over 40′.
7. Backfilling and Structural Support
The backfill material chosen plays a major role in the long-term performance of the pool. As noted, stone should be used for backfilling—not sand. Clean, angular stone compacts well, drains effectively, and supports the shell without trapping water against it.
Key practices during backfilling:
Backfilling all the way around with a machine when possible keeps forces on the shell even.
The 8″ non-perfed pipe for hydrostatic wellpoint should be installed during backfilling. This provides a relief point for groundwater and is a valuable long-term safeguard.
T-boards in place to keep walls straight span across the pool to maintain correct width and prevent inward pressure on the walls as stone is added.
Backfilling in lifts is standard practice—adding a portion of stone, lightly compacting, then adding water inside the pool shell to match the level of the backfill. This keeps pressure balanced between the inside and outside of the pool, protecting the shell structure.
8. Plumbing Layout and Best Practices
The use of schedule 40 2″ rigid pipe, a propane tank and torch to heat pipes, and heated pipes to eliminate 90° fittings reflects a thoughtful hydraulic approach. Gentle sweeps and minimal tight elbows improve water flow and reduce strain on the pump.
When planning plumbing layout:
Keeping plumbing runs to no more than 25′ from the shell when possible maintains efficient circulation.
All suction and return lines should be clearly labeled, including skimmer to pump, returns, and any vacuum or water feature lines.
The skimmer location on the side wall for the auto cover should be coordinated early so that cover tracks, skimmer height, and coping all work together.
Installing lights and plumbing to the shell, including the coupling and 90 for the light niche, typically happens while the pool is partially backfilled. All fittings must be properly solvent-welded, and manufacturer instructions for tightening and sealing light niches and conduits must be followed precisely.
9. Equipment Pad and System Setup
Equipment pads installed and leveled form the foundation for the operational side of the pool. Using pre-formed slabs—such as AC pads—is a quick and sturdy solution.
On the equipment pad, the contractor will typically install:
Pool pump, sized correctly for the pool volume and hydraulic layout.
Filter, which may be cartridge, sand, or DE, selected based on maintenance preferences.
Heater, plumbed and connected to extend the swimming season and maintain comfortable water temperature.
Sanitizer system, such as a saltwater chlorine generator or tablet feeder, to maintain safe water chemistry.
Once the pool heater, filter, pump, and sanitizer are ready to be connected, time should be taken to align valves and unions so that future maintenance is straightforward. Neat and accessible plumbing pays off every time the pool needs to be winterized, opened in spring, or have equipment serviced.
10. Finishing Touches, Decking, and Landscaping
After the shell is ready for water—typically the next day—the focus shifts to shaping the outdoor living space around the new pool. Finishing touches may include:
Coping and decking: Concrete, pavers, or natural stone create a clean transition from pool edge to deck. Expansion joints and drainage must be properly planned.
Landscaping: Plantings, mulch beds, and low-voltage lighting soften the hard edges of the build and make evenings around the pool feel inviting.
Furnishings and shade: Loungers, umbrellas, pergolas, and side tables transform the area into a true retreat where family and friends will gather.
Once the pool is filled, contractors check all connections for leaks, verify that skimmers and returns operate correctly, and balance the water chemistry. Walking around the pool at night with the lights on is also a good way to confirm visibility and illumination meet expectations.
11. Ongoing Care and Maintenance Tips
Maintaining a fiberglass pool is straightforward. Here is an overview of what consistent care looks like:
Weekly tasks: Skim debris, empty skimmer and pump baskets, brush walls and steps, and test water for pH, chlorine, and alkalinity.
Monthly checks: Inspect filters, examine fittings for slow drips, and verify that the pump is primed and free of air leaks.
Seasonal prep: Before colder months, clean the pool thoroughly, balance the water, lower the water level if required by the cover system, and install Inground Pool Winter Safety Covers to protect both the pool and family members.
Because fiberglass surfaces are non-porous, they resist algae growth and staining better than many other pool types. With modest effort and consistent water balance, a fiberglass pool will maintain its glossy look for many years.
12. Common Mistakes to Avoid
Awareness of common pitfalls helps homeowners work more effectively with their contractors:
Rushing the base preparation: An uneven or poorly compacted base is one of the main causes of long-term issues. Contractors should take extra time at this stage.
Inadequate backfill material: Using sand or poor-quality fill can trap water and lead to shifting. Clean, angular stone is the correct choice.
Skipping inspections: If local code requires inspections at specific stages, these must be scheduled and signed off before work proceeds.
Overcomplicating plumbing: Too many unnecessary valves, tight 90° turns, or undersized pipe creates long-term headaches. Layouts should be kept simple and efficient.
Addressing these potential problems in advance saves time, money, and stress for everyone involved in the project.
13. Example Project Timeline
While every project is different, here is a general timeline for a typical fiberglass pool shell installation:
Day 1–2: Permits finalized, layout marked, utilities located, stumps removed, grade checked.
Day 3–4: Excavation completed, soil removed, base stone installed and screeded.
Day 5: Pool shell delivered and set, initial backfill and water added.
Day 6–7: Plumbing, equipment pad setup, additional backfill, and electrical work by a licensed electrician.
Day 8–10: Coping, decking formwork, and concrete pour or paver installation.
Day 11–14: Final connections, water balance, site cleanup, and landscaping touches.
Some projects may stretch across several weeks depending on contractor schedules and permit timelines. The efficiency of a fiberglass shell makes it adaptable to a wide range of project plans and budgets.
14. Final Thoughts
A fiberglass pool shell installation is a substantial project that becomes very manageable when broken down into clear, well-coordinated steps—planning, excavation, base preparation, shell placement, plumbing, backfilling, and finishing. The notes and phases detailed above reflect real-world, practical experience: elements like T-boards to maintain square, 8″ well point non-perfed pipe, and heating pipes to eliminate 90’s all come from hands-on installations.
If you’re ready to move forward, Calmwater Pools is here to help you select the right fiberglass pool model, coordinate shell procurement, and arrange delivery to your project site in Maryland, Washington DC, Northern Virginia, or nearby West Virginia. You can also explore our Full-Service Pool Installation option, where an experienced team manages the complete process.
By following a detailed, well-planned process and engaging qualified independent contractors at every stage, homeowners end up with more than just a pool—they gain a backyard centerpiece that provides enjoyment and lasting value for many years to come.